반응형

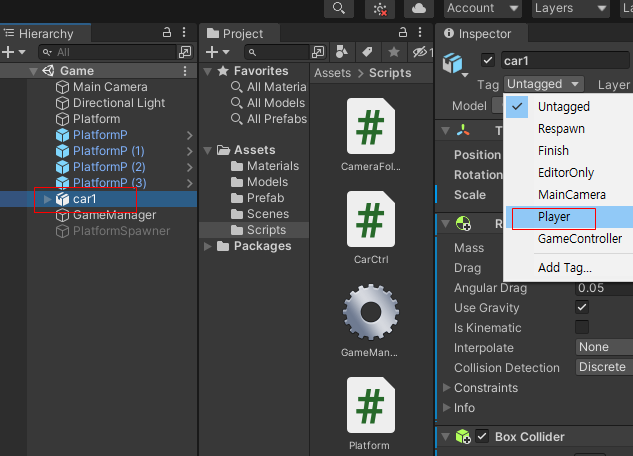
이번 시간에는 게임 뷰에 점수를 보이게 하겠습니다

먼저 Hierarchy 뷰에서 마우스 오른쪽 버튼을 클릭하고   UI -> Text를 생성합니다 

그러면 Hierarchy 뷰에서 Canvas 가 생성됩니다 

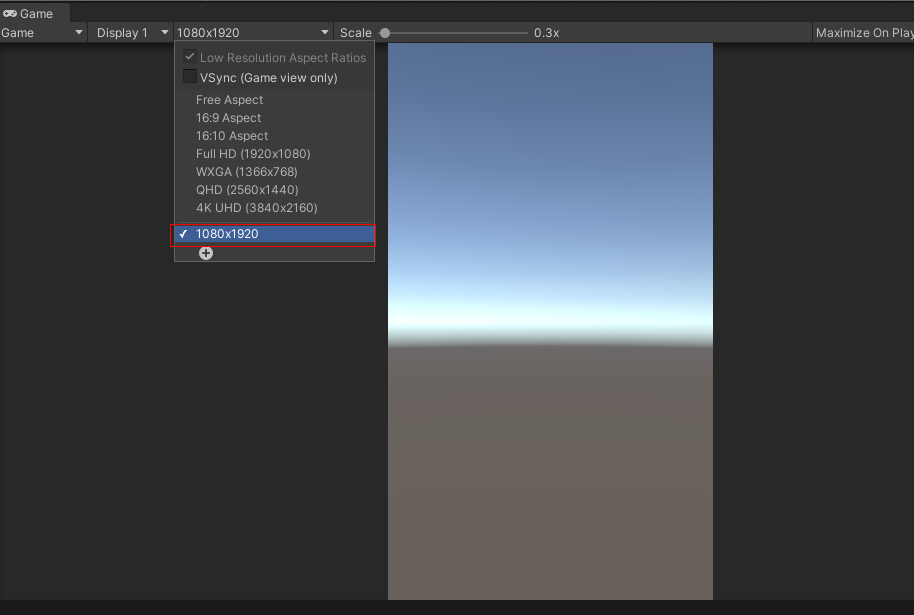
Canvas 를 선택하고  UI Scale Mode -> Scale With Screen Size , Reference Resolution  1080 1920 , Match 0.5에 맞춥니다 


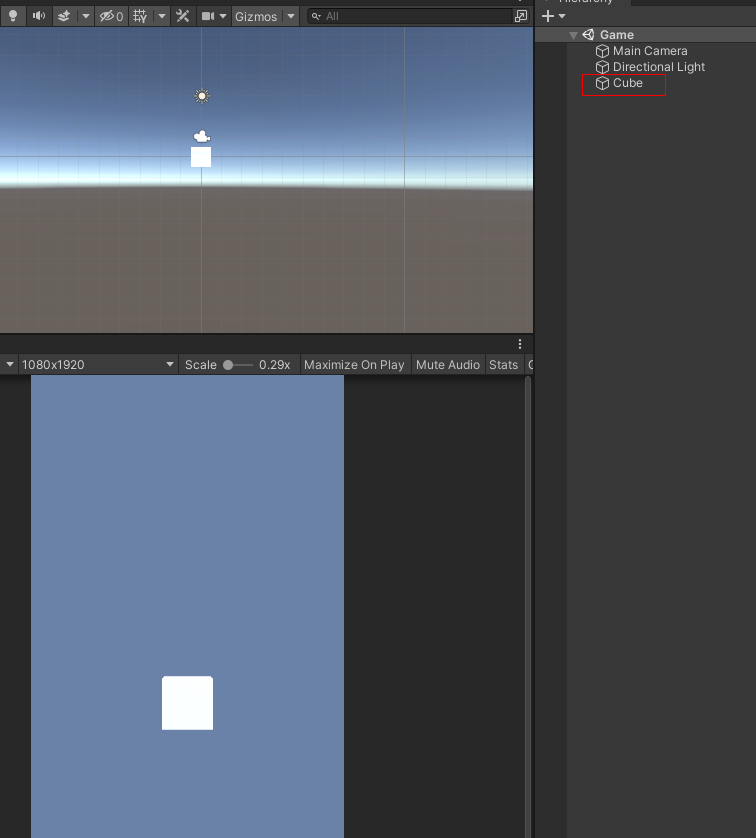
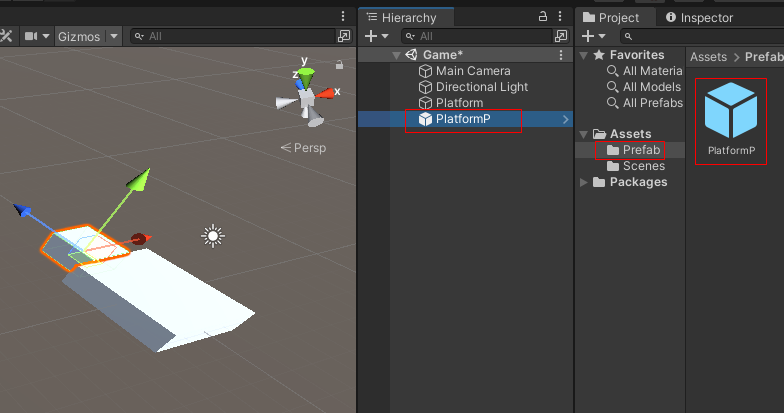
Canvas 자식으로 있는 Text 의 이름을 ScoreText로 바꾸고 ScoreText를 선택하여 Center를 클릭한 다음 아래 사진처럼 top 중앙에 올 수 있도록 합니다 


그리고 Canvas 를 클릭하고 마우스 오른쪽을 클릭하고 Create Empty 하여 GameObject를 생성한 다음 이름을 GameUI로 고친 후 ScoreText를 자식으로 놓습니다 

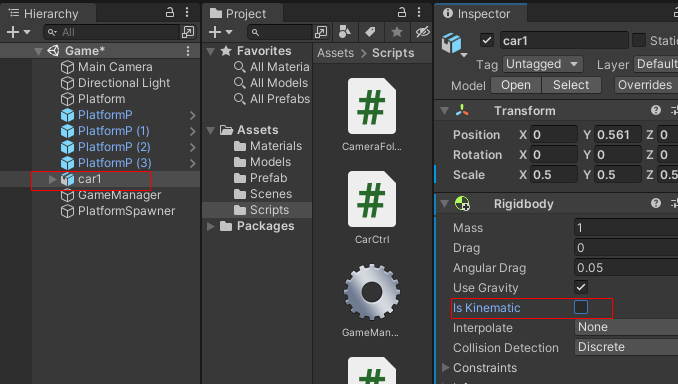
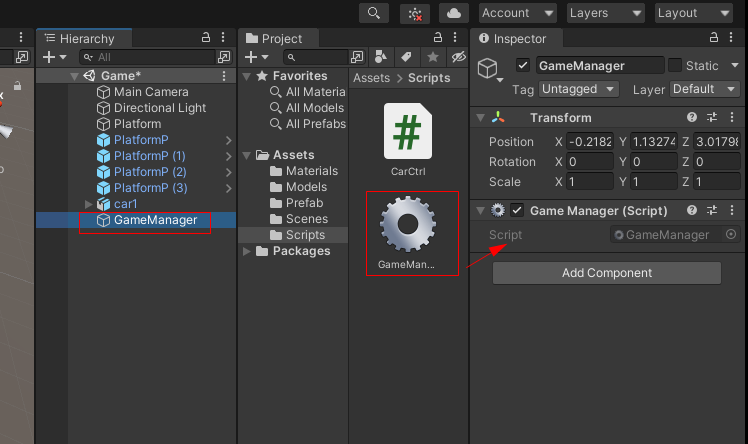
GameManager 스크립트를 수정합니다 


점수 Text 를 넣을 수 있는 네임스페이스(using UnityEngin.UI)를 추가하고 변수에 int score = 0 , pulic Text scoreText 추가 GameStart() 함수에 gameUI.SetActive(true)   StartCoroutine(UpdateScore()) 추가

 IEnumerator UpdateScore()
    {
        //1초 지날때 마다 1점씩 올라간다 
        while (true)
        {
            yield return new WaitForSeconds(1f);
            score++;

            scoreText.text = score.ToString();
        }
    }


추가 합니다 


반응형


using System.Collections;
using System.Collections.Generic;
using UnityEngine;
using UnityEngine.SceneManagement;
using UnityEngine.UI;


public class GameManager : MonoBehaviour
{
    public static GameManager instance;

    //
    public GameObject platformSpawner;

    public GameObject gameUI;

    public bool gameStarted;

    int score = 0;

    public Text scoreText;

    private void Awake()
    {
        if (instance == null)
        {
            instance = this;
        }
    }

    // Start is called before the first frame update
    void Start()
    {
        
    }

    // Update is called once per frame
    void Update()
    {
        if (!gameStarted)
        {
            //마우스 클릭하면 차가 움직인다 
            if (Input.GetMouseButtonDown(0))
            {
                GameStart();
            }
        }
    }

    public void GameStart()
    {
        gameStarted = true;
        //platformSpawner 스크립트를 실행
        platformSpawner.SetActive(true);

        gameUI.SetActive(true);
        StartCoroutine(UpdateScore());
    }


    public void GameOver()
    {
        //platformSpawner 스크립트를 없앤다
        platformSpawner.SetActive(false);

        //1초후 게임재시작 함수에 전달 
        Invoke("ReloadGame",1);
    }

    //게임재시작
    void ReloadGame()
    {
        SceneManager.LoadScene("Game");
    }

    IEnumerator UpdateScore()
    {
        //1초 지날때 마다 1점씩 올라간다 
        while (true)
        {
            yield return new WaitForSeconds(1f);
            score++;

            scoreText.text = score.ToString();
        }
    }
}


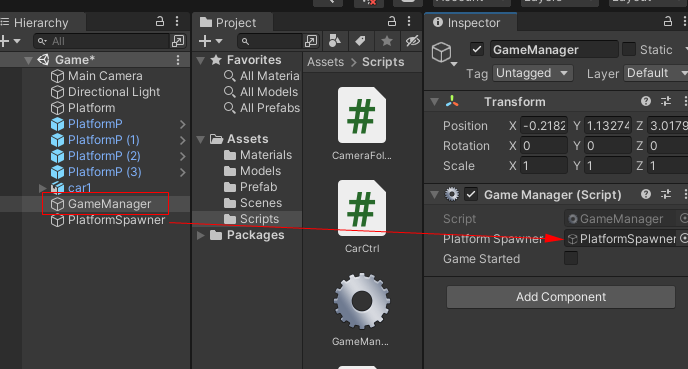
Hierarchy 뷰에서 Canvas 자식으로 있는 GameUI를 끄고 GameManager를 선택하여 GameUI와 ScoreText를 연결합니다 


게임을 실행하여 점수가 올라가는지 확인합니다 


반응형
반응형

이번 시간에는 게임이 끝나면 게임을 재시작하는 스크립트를 짜고 3D 게임에서 오브젝트를 밝게 비추는 라이트를 고정해 놓는 작업을 하겠습니다


먼저 Hierarchy 뷰에서 GameManager 오브젝트를 선택하여 GameManager 스크립트를 열고 스크립트를 수정합니다 


반응형


GameManager 스크립트 수정


스크립트를 열고 네임스페이스 부분에서

using UnityEngine.SceneManagement;

를 추가합니다 

그리고 ReloadGame() 함수를 추가하여 GameOver() 함수에서 실행하는 명령을 추가합니다 

using System.Collections;
using System.Collections.Generic;
using UnityEngine;
using UnityEngine.SceneManagement;

public class GameManager : MonoBehaviour
{
    public static GameManager instance;

    //
    public GameObject platformSpawner;

    public bool gameStarted;

    private void Awake()
    {
        if (instance == null)
        {
            instance = this;
        }
    }

    // Start is called before the first frame update
    void Start()
    {
        
    }

    // Update is called once per frame
    void Update()
    {
        if (!gameStarted)
        {
            //마우스 클릭하면 차가 움직인다 
            if (Input.GetMouseButtonDown(0))
            {
                GameStart();
            }
        }
    }

    public void GameStart()
    {
        gameStarted = true;
        //platformSpawner 스크립트를 실행
        platformSpawner.SetActive(true);
    }


    public void GameOver()
    {
        //platformSpawner 스크립트를 없앤다
        platformSpawner.SetActive(false);

        //1초후 게임재시작 함수에 전달 
        Invoke("ReloadGame",1);
    }

    //게임재시작
    void ReloadGame()
    {
        SceneManager.LoadScene("Game");
    }
}


게임을 재시작 할려면 신을 추가하여야 합니다 

File -> Build Settings 를 열고 Game 신을 추가합니다 


게임을 재시작하면 라이트가 꺼지는 현상을 보게 될것입니다 

그래서 라이트를 고정할려면 라이트맵을 만들어야 합니다 

Window -> Rendering -> Lighting에 들어갑니다 


Lighting  탭에서 맨 마지막에  Generate Lighting 을 클릭합니다 


라이트 맵이생성되었습니다 


게임을 실행하여 1초후 게임이 재실행되고 라이트가 고정되었는지 확인합니다 


반응형
반응형

이번에는 자동차가 도로에서 벗어나면 자동차가 떨어지고 게임이 끝나는 시연을 하겠습니다


먼저 Hierarchy뷰에서 car1을 선택하고 is Kinematic을 체크 해저 합니다 

is Kinematic을 해제하면 자동차가 중력의 영향을 받게 됩니다 


CarCtrl스크립트를 수정합니다 


Update() 함수에

     if (transform.position.y <= -2)
        {
            GameManager.instance.GameOver();
        }

항목을 추가합니다 

car1 이 중력을 받고 떨어지면 게임을 끝내는 GameOver() 함수를 실행합니다 


using System.Collections;
using System.Collections.Generic;
using UnityEngine;

public class CarCtrl : MonoBehaviour
{
    public float moveSpeed;
    bool sideMoving = true;
    bool firstInput = true;

    // Start is called before the first frame update
    void Start()
    {
        
    }

    // Update is called once per frame
    void Update()
    {
        if (GameManager.instance.gameStarted)
        {
            Move();
            CheckInput();
        }

        //자동차가 중력을 받고 떨어졌을때 y 값이 떨어지면 게임오버실행
        if (transform.position.y <= -2)
        {
            GameManager.instance.GameOver();
        }
    }

    void Move()
    {
        //물체의 z축 방향(forward)으로 moveSpeed 만큼 시간 프레임에 곱해준다 
        transform.position += transform.forward * moveSpeed * Time.deltaTime;
    }


    void CheckInput()
    {
        //첫 클릭은 무시하고 리턴한다 
        if (firstInput)
        {
            firstInput = false;
            return;
        }


        //마우스를 왼쪽버튼 클릭하면
        if (Input.GetMouseButtonDown(0))
        {
            ChangeDirection();
        }
    }
    void ChangeDirection()
    {
        //sideMoving 참일때  
        if (sideMoving)
        {
            sideMoving = false;

            //y축 방향으로 90도 회전한다
            transform.rotation = Quaternion.Euler(0, 90, 0);
        }
        else
        {
            sideMoving = true;
            transform.rotation = Quaternion.Euler(0, 0, 0);
        }
    }
}


GameManager스크립트를 수정합니다 


using System.Collections;
using System.Collections.Generic;
using UnityEngine;

public class GameManager : MonoBehaviour
{
    public static GameManager instance;

    //
    public GameObject platformSpawner;

    public bool gameStarted;

    private void Awake()
    {
        if (instance == null)
        {
            instance = this;
        }
    }

    // Start is called before the first frame update
    void Start()
    {
        
    }

    // Update is called once per frame
    void Update()
    {
        if (!gameStarted)
        {
            //마우스 클릭하면 차가 움직인다 
            if (Input.GetMouseButtonDown(0))
            {
                GameStart();
            }
        }
    }

    public void GameStart()
    {
        gameStarted = true;
        //platformSpawner 스크립트를 실행
        platformSpawner.SetActive(true);
    }


    public void GameOver()
    {
        //platformSpawner 스크립트를 없앤다
        platformSpawner.SetActive(false);
    }
}


GameManager 스크립트를 수정하고 GameManager스크립트 PlatformSpawner 빈 공간에 PlatformSpawner 오브젝트를 연결합니다 


Hierarchy뷰에서 PlatformSpawner 오브젝트를 선택하고 Inspector를 체크 해제합니다 


Main Camera를 선택하여 CameraFollow 스크립트를 수정합니다 


Update() 함수 부분을 수정하여 

      if (target.position.y >= 0)
        {
            Follow();
        }


자동차가 y값이 0 이상일 때만 따라 움직이게 합니다 


using System.Collections;
using System.Collections.Generic;
using UnityEngine;

public class CameraFollow : MonoBehaviour
{
    public Transform target;

    Vector3 distance;
    public float smoothValu;

    // Start is called before the first frame update
    void Start()
    {
        // 카메라와 타겟 자동차와의 거리
        distance = target.position - transform.position;
    }

    // Update is called once per frame
    void Update()
    {
        //자동차가 떨어지지 않으면 Follow()실행, 떨어지면 카메라가 움직이지 않는다 
        if (target.position.y >= 0)
        {
            Follow();
        }

       
    }

    void Follow()
    {
        //현재 카메라 포지션
        Vector3 currentPos = transform.position;

        //현재 타겟 자동차 
        Vector3 targetPos = target.position - distance;

        //currentPos(카메라)가 targetPos(자동차)을 smoothValu 만큼 time 프레임에 맞쳐 뒤따라간다
        transform.position =  Vector3.Lerp(currentPos, targetPos, smoothValu * Time.deltaTime);


    }
}


Platform 스크립트를 생성합니다 


Prefab 폴더의 PlatformP 프리 팹을  선택하고 Plaform 스크립트를 연결합니다


Platform 스크립트 작성

using System.Collections;
using System.Collections.Generic;
using UnityEngine;

public class Platform : MonoBehaviour
{
    // Start is called before the first frame update
    void Start()
    {
        

    }

    // Update is called once per frame
    void Update()
    {
        
    }

    private void OnCollisionExit(Collision collision)
    {

        //Player태그를 가진 오브젝트와 닿았을때  0.2초후 Fall()실행
        if (collision.gameObject.tag == "Player")
        {
            Invoke("Fall", 0.2f);
        }
    }
    void Fall()
    {
        //중력의 영향을 받고 물체를 떨어진다  그리고 1초후 삭제 
        GetComponent<Rigidbody>().isKinematic = false;
        Destroy(gameObject, 1f);
    }
}


car1 오브젝트를 선택하고 Inspector에서 Tag -> Player를 줍니다 


게임을 실행하여 도로블록이 자동차가 지나갔을 때 아래로 떨어지고 자동차가 도로에서 벗어나면 자동차가 중력을 받고 떨어지고 블록 생성이 중단되는지 확인합니다 


반응형
반응형

자동차의 시점을 따라가도록 카메라의 스크립트를 달아 자동차를 따라가게 하고 자동차의 도로 역할을 하는 사각 블록을 자동으로 생성되는 스크립트를 만들어보겠습니다


Hierarchy 뷰에 Create Empty 를 만들어서  이름을 PlatformSpawner로 합니다 


Scripts폴더에 PlatformSpawner 스크립트를 생성하고 스크립트작성할 준비를 합니다 


PlatformSpawner 오브젝트의 PlatformSpawner 스크립트를 붙힙니다 


PlatformSpawner 스크립트작성

using System.Collections;
using System.Collections.Generic;
using UnityEngine;

public class PlatformSpawner : MonoBehaviour
{
    public GameObject platform;

    public Transform lastPlatform;
    Vector3 lastPosition;
    Vector3 newPos;


    bool stop;
    // Start is called before the first frame update
    void Start()
    {
        lastPosition = lastPlatform.position;

        StartCoroutine(SpawnPlatforms());

    }

    // Update is called once per frame
    void Update()
    {


        //if (Input.GetKey(KeyCode.Space))
        //{
        //    SpawnPlatforms();
        //}
    }

    IEnumerator SpawnPlatforms()
    {

        while (!stop)
        {
            GeneratePosition();

            //마지막플랫폼블럭위치에 newPos만큼 새로운 플랫폼블럭을 생성한다
            Instantiate(platform, newPos, Quaternion.identity);

            lastPosition = newPos;

            yield return new WaitForSeconds(0.1f);
        }


    }

    //void SpawnPlatforms()
    //{
    //    GeneratePosition();


    //    //마지막플랫폼블럭위치에 newPos만큼 새로운 플랫폼블럭을 생성한다
    //    Instantiate(platform, newPos, Quaternion.identity);
        
    //    lastPosition = newPos;
    //}

// 랜덤으로 lastPosition 값을 x,y 값 2만큼 움직이게 한다 
    void GeneratePosition()
    {
        newPos = lastPosition;

        int rand = Random.Range(0, 2);

        if (rand > 0)
        {
            newPos.x += 2f;
        }
        else
        {
            newPos.z += 2f;
        }

    }
}


Hierarchy뷰에서  PlatformSpawner 오브젝트를 선택하고 작성한 PlatformSpawner 스크립트 공백에 Platform 에는 프리 팹으로 넣은 PlatformP 프리 팹을 넣어주고, Last Platform 에는 박스 오브젝트 복사 모듈인 PlatformP (3)을 넣어줍니다


자동차의 움직임을 자연스럽게 카메라를 따라가는 스크립트를 만듭니다

Main Camera를 선택하고 CameraFollow 스크립트를 생성하여 Main Camera에 붙입니다 


CameraFollow 스크립트 작성

using System.Collections;
using System.Collections.Generic;
using UnityEngine;

public class CameraFollow : MonoBehaviour
{
    public Transform target;

    Vector3 distance;
    public float smoothValu;

    // Start is called before the first frame update
    void Start()
    {
        // 카메라와 타겟 자동차와의 거리
        distance = target.position - transform.position;
    }

    // Update is called once per frame
    void Update()
    {
        Follow();
    }

    void Follow()
    {
        //현재 카메라 포지션
        Vector3 currentPos = transform.position;

        //현재 타겟 자동차 
        Vector3 targetPos = target.position - distance;

        //currentPos(카메라)가 targetPos(자동차)을 smoothValu 만큼 time 프레임에 맞쳐 뒤따라간다
        transform.position =  Vector3.Lerp(currentPos, targetPos, smoothValu * Time.deltaTime);


    }
}


Main Camera를 선택하고  CameraFollow 스크립트 빈칸에 Target -> car1, smoothValu 5를 줍니다 

게임을 실행하여 자동차 움직임의 시점을 따라가는지 확인하고  자동차 도로의 블록이 자동으로 생성되는지 확인합니다


3D Game 자동차 게임 지그재그 게임만들기 4 로 이동


반응형
반응형

스크립트를 작성하여 자동차를 움직여 보겠습니다 


Scripts 폴더에 CarCtrl 스크립트를 만들고  car1 오브젝트에 붙입니다  

그리고 잠시 Rigdbody 에서 is Kinematic을 체크합니다 


CarCtrl 스크립트 작성

using System.Collections;
using System.Collections.Generic;
using UnityEngine;

public class CarCtrl : MonoBehaviour
{
    public float moveSpeed;
    bool sideMoving = true;
    bool firstInput = true;

    // Start is called before the first frame update
    void Start()
    {
        
    }

    // Update is called once per frame
    void Update()
    {
        if (GameManager.instance.gameStarted)
        {
            Move();
            CheckInput();
        }

    }

    void Move()
    {
        //물체의 z축 방향(forward)으로 moveSpeed 만큼 시간 프레임에 곱해준다 
        transform.position += transform.forward * moveSpeed * Time.deltaTime;
    }


    void CheckInput()
    {
        //첫 클릭은 무시하고 리턴한다 
        if (firstInput)
        {
            firstInput = false;
            return;
        }


        //마우스를 왼쪽버튼 클릭하면
        if (Input.GetMouseButtonDown(0))
        {
            ChangeDirection();
        }
    }
    void ChangeDirection()
    {
        //sideMoving 참일때  
        if (sideMoving)
        {
            sideMoving = false;

            //y축 방향으로 90도 회전한다
            transform.rotation = Quaternion.Euler(0, 90, 0);
        }
        else
        {
            sideMoving = true;
            transform.rotation = Quaternion.Euler(0, 0, 0);
        }
    }
}


Move Speed 8을 넣습니다 

그리고 GameManager 스크립트를 만듭니다 


Hierachy 뷰에서 GameManager 오브젝트를 만들고 GameManager 스크립트를 붙입니다 


GameManager 스크립트 작성

using System.Collections;
using System.Collections.Generic;
using UnityEngine;

public class GameManager : MonoBehaviour
{
    public static GameManager instance;

    public bool gameStarted;

    private void Awake()
    {
        if (instance == null)
        {
            instance = this;
        }
    }

    // Start is called before the first frame update
    void Start()
    {
        
    }

    // Update is called once per frame
    void Update()
    {
        if (!gameStarted)
        {
            //마우스 클릭하면 차가 움직인다 
            if (Input.GetMouseButtonDown(0))
            {
                GameStart();
            }
        }
    }

    public void GameStart()
    {
        gameStarted = true;
    }


    public void GameOver()
    {
       
    }
}


게임을 실행시키고 자동차가  마우스를 클릭하였을때 움직이고 방향이 바뀌는지 확인합니다 


3D Game 자동차 게임 지그재그 게임 만들기 3


반응형
반응형

3D 자동차 게임 만들기

자동차가 순간 맞추어지는 도로에 따라 지그재그 움직이는 게임입니다 


가로 뷰로 게임을 실행하므로 

유니티 엔진의 Game 뷰를 1080 X 1920  맞춥니다


씬 이름을 Game으로 바꿉니다 


메인 카메라를 선택하고 Clear Flags를 Solid Color로 바꿉니다

그리고 Background 색깔을 각자 분위기에 맞게 색깔을 지정합니다

저는 푸른색으로 바꾸었습니다 


Hierarchy 뷰에서  GameObject ->Cube를  생성합니다 

Cube가 Game 뷰에서 생성된 모습을 볼 수 있습니다 


GameObject 인 Cube의 이름을 Platform이라 하고  Inspector 메뉴에서 Scale 4,1,4로 바꿉니다 


Main Camera를 선택하고  Scene뷰에서  Platform 오브젝트를 대각선 방향으로 윗면이 보이게 아래 그림처럼 방향을 설정하고  GameObjet-> Align With View를 선택하면 Scen 뷰에서 방향을 맞춘 Camera 방향이 Game 뷰에 맞추어지게 됩니다 


그리고 Main Camera를 선택하고 Inspector 메뉴에서 Projection -> Orthographic  

Size -> 7에 맞춥니다  


hierarchy에서  Platform을 복사하여 새로운 Platform을 만들고 위치를 z 3 만큼 움직이고 Scale 2,1,2 

를 맞추고 BoxCollider를 생성하고 RigidBody 생성하여  Is Kinematic 체크합니다 


그리고  복사한 Platform의 이름을 PlatformP로 바꾸고 Project  Assets 폴더에서  Prefab 폴더를 생성하고 PlatformP를 저장합니다 


PlaformP 오브젝트를 3개 더 복사하여 Z 간격을 각각 2 만큼씩 띄웁니다 


car1.FBX
0.04MB


car1 FBX 파일을 다운로드하여 유니티 엔진의 Project Assets의 Models 폴더를 만들고 car1 파일을 저장합니다 


다운로드한 car1 파일을 선택하고 Model -> Scale Factor 0.01을 합니다 


Models 파일에 있는 car1 파일을 드래그하여 Hierarchy 뷰 에 갖다 놓고 Scale 0.5 ,0.5, 0.5에 맞춥니다 


car1을 선택하고  Rigidbody 추가하고 BoxCollider를 추가합니다 


게임만들기 2편 보기


반응형

+ Recent posts